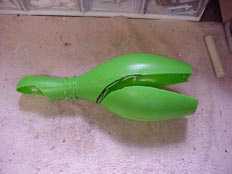
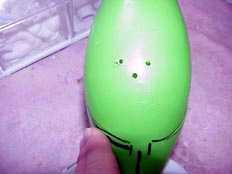
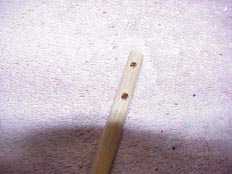
Start with an "e" pin
or a flat bottomed Crown pin
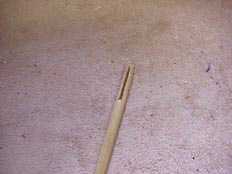
Cut as shown
I use a carpeting knife to cut them. These are very sharp
So Be Careful
Be sure to leave about 3/4" uncut at the base of the "jaw"
This will act as a hinge
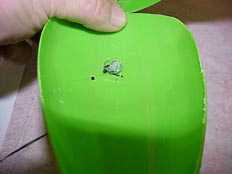
Next drill a 5/8" hole in the neck of the pin
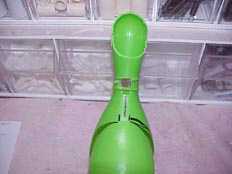
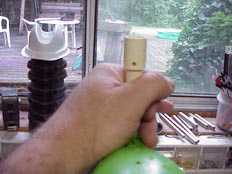
Take a piece of 1/2" CPVC
4" long and pass it through the hole in the neck and attach a 1/2" cpvc coupling on the bottom
allowing it to extend about 1 1/2" above the top of the pin
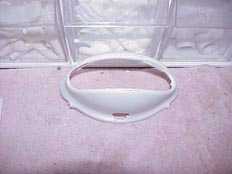
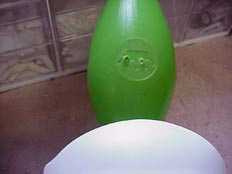
Drill a 5/8" hole in the base of the mask. Make sure the hole is centered and against the back lip of the mask, there should be about 1/2" of plastic behind the hole
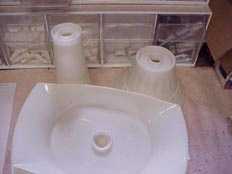
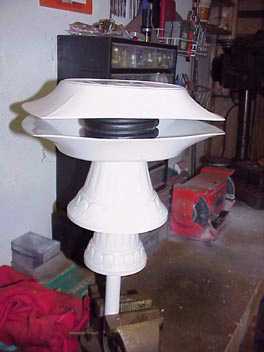
You will need 2 sets of Floraliers
the extra one is for the 2nd tray
If you need a spare tray,
I have vacuform copies as well as originals
Drill a 1" hole in both trays and both vases of the Floralier parts
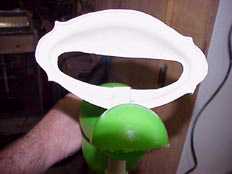
The 4" cpvc that extends through the pin is where the mask will sit
Hot-glue the mask and the pin to the cpvc once everything is aligned. The top of the pipe should be even with the bottom edge of the mask opening

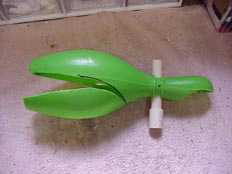
Once everything is straight and glued,
you have Crow's head almost completed, so set it aside
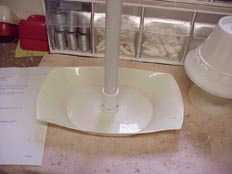
Take a 14" long piece of 3/4" PVC and put a 3/4" coupling on the end of it
You'll have to grind or sand the outside of the coupling a bit so it will fit into the top tray
The 3/4" PVC coupling should fit snugly into the tray, but add a few dabs of hot-glue to it anyway, just to be sure.

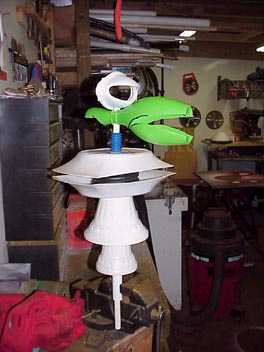
Now slide a piece of 4" diameter drainage hose over the 3/4" pipe and glue it to the top tray.
If you put the other tray and the 2 vases on the pipe, it will hold it in place while the glue dries
Next take a 16" long piece of 1/2" diameter CPVC and attach it to the coupling on the head
Cut a 3" piece of poppet,
slide it on the 1/2" pipe and drop the pipe into the larger 3/4" PVC pipe
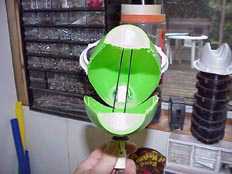
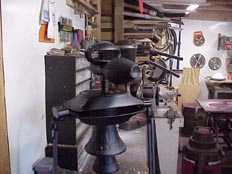
If all went well
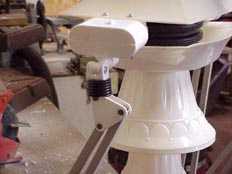
You should be looking at this
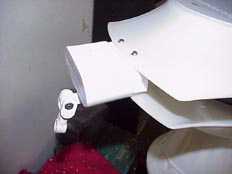
Drill 2) 1/4" holes through the upper tray, the shoulder units and the lower tray and attach the shoulder units with #6 x 2" screws
Drill a 1/8" hole in the lower 1/2" coupling and through one side of the pipe in the front
This is for the mouth string to pass through
Next Drill 3) 1/8" holes in the lower "jaw" 2 of them should be centered, about 3/4" apart, the third hole should be about 1/2" behind them
Drill 2) 1/8" holes in the upper "jaw" directly above the 2 in the lower "jaw"
Take 30" of string and thread it through the rear hole in the bottom jaw.
I tie a small nut on the string to keep it from pulling through the hole. The string is then fed through the neck hole & down the pipe.
thread a piece of elastic through the 2 top holes, then through the bottom 2 holes and tie a good knot in the elastic at the bottom.
This will hold the mouth closed & re-close it when it's pulled open with the string
Now for the eyes...
I use a 3/8" wooden dowel
I drill 2 holes 1/8" diameter in the end of the rod. One is 1/2" from the top, the other 1" from the top
On the same end that you drilled the holes, You have to saw a slice out of the rod about 1 1/2" long
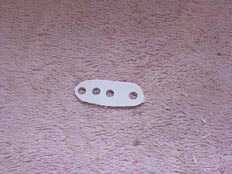
Cut a piece of styrene 1" long x by 1/2" wide, Drill 4 holes in it 1/4" diameter as shown

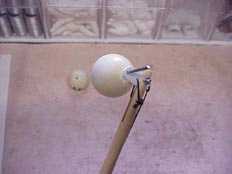
Slide the drilled styrene in to the slot, using the second hole attach the piece to the dowel with a 1" x #6 screw
Attach a piece of string to the back hole and a piece of elastic to the the third hole and tie it off in the lower hole
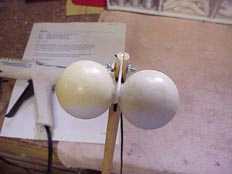
Take 2 ping-pong balls and drill 1/16" holes in each glue a #6 finish nail into one of the holes in the ball, slide the nail through the remaining hole in the styrene and glue the other ping-pong ball on
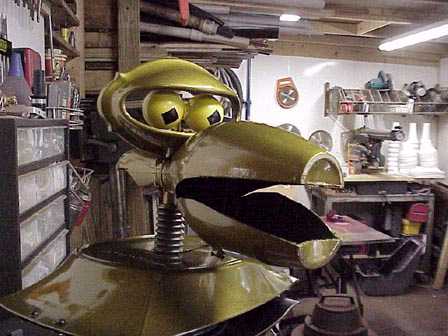
This is what you should have.
Pulling the string should raise the eyes and releasing the string should bring them back to the down position.

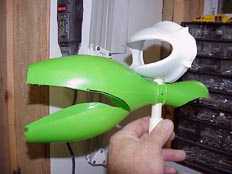
Crow's arms are made from 3/8" square Plastruct Tubing
The upper arms are 10 1/2" long, the lower arms are 9 1/2" long. You can cut the joints from .080 styrene, but I recommend using the pre-made arm units, it's a lot easier and I get to sell them to you.
Another small piece of poppet about 3/4" goes on over the lower joint, then the arm is attached with a #6 x 3/4" bolt
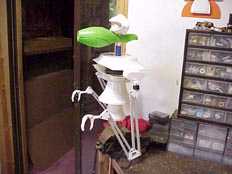
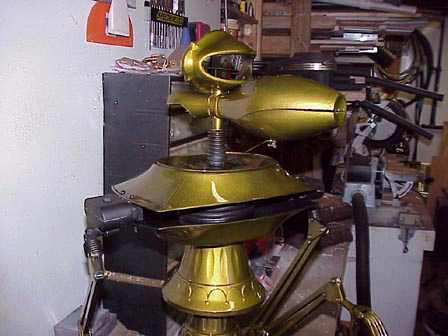
Crow looks pretty good now
The strings exposed at the bottom should open & close his mouth, raise and lower his eyes and the pipe & dowel should rotate the head and eyes
If everything works and fits well,
Time to take him all apart, sand him, prime him and paint him.
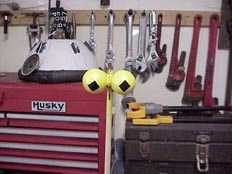
Paint the eye assembly with Krylon
Day-Glow Yellow
Then add the pupils which are 5/8" squares of black electrical tape
I prime all the parts with Painter's Touch Sandable Primer
I use black as I like the way it looks under the finish coat.
Be sure to sand before each coat of paint
The shoulders stay black as do the insides of the Floraliers, the inside of the pin and the inside of the soapdish
The rest gets a few coats of Testor's #1642 Lime Gold Metalflake
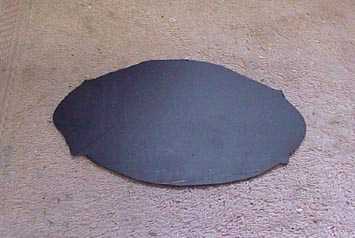

Crow's needs a backplate
I cut them from a piece of black .060 styrene, using the soapdish as a template
(cardboard will also work)
Re-install Crows eyes
Then hot-glue the backplate in place.
You can now add the 1/2" foam pipe insulation to the arms
The last thing I put on is the Cooper XL7 hockey mask
I finish it the same as the other parts and attach it with 2 self-tapping screws